The Complete Step-by-Step Guide to Performing a Professional Home Energy Audit
Published 7/29/2026
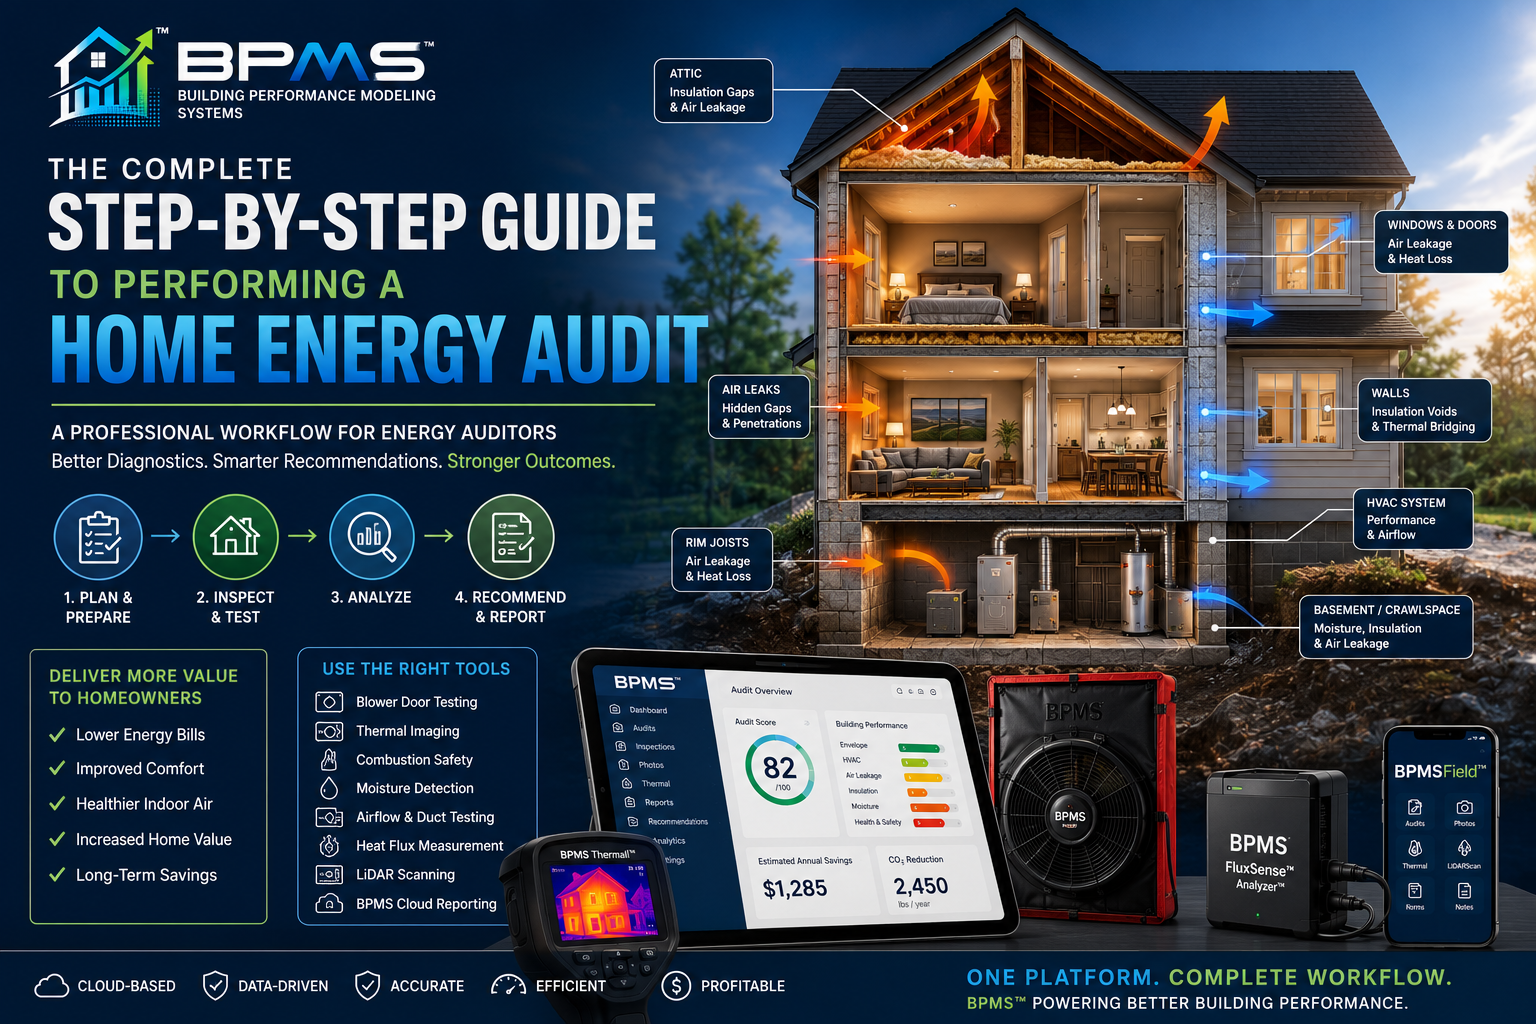
Whether you’re a new energy auditor or an experienced building performance professional, following a structured audit process is essential for delivering accurate diagnostics and valuable recommendations. This comprehensive guide walks through every phase of a professional home energy audit—from customer intake and safety inspections to blower door testing, thermal imaging, combustion safety, HVAC evaluation, insulation assessment, and final reporting.
The Complete Step-by-Step Guide to Performing a Professional Home Energy Audit
Introduction
A professional home energy audit is much more than walking through a home with an infrared camera. It is a systematic evaluation of how the building enclosure, HVAC systems, insulation, ventilation, moisture management, and occupant behavior interact to influence comfort, energy consumption, indoor air quality, and durability.
An effective energy auditor approaches each home as an interconnected system. Rather than identifying isolated deficiencies, the auditor determines how one component affects the performance of another and develops recommendations based on measured data rather than assumptions.
This guide provides a complete workflow that can be adapted for residential energy audits, weatherization assessments, Home Energy Score evaluations, and building performance projects.
⸻
Phase 1 – Pre-Audit Preparation
Review Client Information
Before arriving on site, gather as much background information as possible.
Collect:
* Homeowner contact information
* Property address
* Year built
* Square footage
* Number of stories
* Occupancy
* Fuel types
* Utility providers
* Previous upgrades
* Renovation history
* Existing HVAC equipment
* Customer comfort concerns
Request at least 12 months of utility bills to identify seasonal energy trends.
⸻
Prepare Equipment
Every auditor should verify that all diagnostic equipment is functioning and calibrated before leaving for the job.
Essential Diagnostic Tools
Air Leakage
* Blower Door System
* Digital Pressure Gauge (Manometer)
* Flow Rings
* Smoke Pencil
* Fog Generator (optional)
⸻
Thermal Diagnostics
* Infrared Camera
* Extra Batteries
* Calibration Verification
⸻
Combustion Safety
* Combustion Analyzer
* Carbon Monoxide Meter
* Draft Gauge
* Gas Leak Detector
⸻
Airflow
* Flow Hood
* Anemometer
* Balometer (optional)
⸻
Moisture
* Pin Moisture Meter
* Pinless Moisture Meter
* Hygrometer
⸻
Electrical
* Clamp Meter
* Outlet Tester
* Voltage Tester
⸻
Building Measurements
* Laser Distance Meter
* Tape Measure
* Digital Level
* Compass
* Camera
* Tablet or Mobile Device
⸻
Advanced Diagnostics
* BPMS FluxSense Analyzer™
* BPMS Thermal™
* BPMSField™
* LiDAR Scanner
* Drone (where appropriate)
⸻
Phase 2 – Initial Homeowner Interview
The homeowner often provides valuable clues before testing begins.
Ask about:
* Drafts
* Cold rooms
* Hot rooms
* Moisture
* Condensation
* Mold
* Ice dams
* High utility bills
* HVAC complaints
* Allergies
* Noise
* Odors
Document everything.
Many diagnostic findings can later be correlated with homeowner observations.
⸻
Phase 3 – Exterior Inspection
Evaluate:
Roof
* Condition
* Ventilation
* Soffit vents
* Ridge vents
* Roof penetrations
⸻
Walls
Inspect for:
* Cracks
* Moisture
* Missing siding
* Thermal bridges
* Foundation movement
⸻
Windows
Evaluate:
* Glazing
* Seal condition
* Weatherstripping
* Frame quality
* Solar exposure
⸻
Doors
Inspect:
* Thresholds
* Sweeps
* Air leakage
* Weatherstripping
⸻
Foundation
Look for:
* Settlement
* Moisture
* Cracks
* Ventilation
* Drainage
⸻
Phase 4 – Interior Inspection
Document every conditioned space.
Evaluate:
* Ceiling heights
* Room dimensions
* Floor types
* Wall finishes
* Moisture damage
* Window orientation
* Lighting
* Appliances
Photograph everything.
⸻
Phase 5 – HVAC Assessment
Record:
* Manufacturer
* Model
* Serial Number
* Capacity
* Fuel
* Age
* Efficiency Rating
Inspect:
* Filter condition
* Blower cleanliness
* Refrigerant lines
* Duct insulation
* Airflow balance
* Return sizing
Measure:
* Supply temperatures
* Return temperatures
* Temperature split
* Static pressure (where appropriate)
⸻
Phase 6 – Attic Inspection
One of the most critical portions of every audit.
Inspect:
* Insulation depth
* Insulation type
* Compression
* Missing insulation
* Wind washing
* Air bypasses
* Recessed lighting
* Plumbing penetrations
* Top plates
* Chimney chases
* Ventilation
⸻
Phase 7 – Basement / Crawlspace
Evaluate:
* Foundation insulation
* Rim joists
* Moisture
* Vapor barriers
* Drainage
* Bulk water
* Air leakage
* Ductwork
⸻
Phase 8 – Insulation Assessment
Identify:
* R-values
* Missing insulation
* Voids
* Compression
* Moisture damage
Document insulation in:
* Walls
* Attic
* Foundation
* Floors
* Rim Joists
* Kneewalls
* Garage ceilings
⸻
Phase 9 – Blower Door Testing
Set up the blower door according to the manufacturer’s procedures.
Conduct baseline pressure measurements before depressurization.
Record:
* CFM50
* ACH50
* Baseline Pressure
* Building Volume
Use smoke pencils to identify leakage at:
* Windows
* Doors
* Top plates
* Rim joists
* Plumbing penetrations
* Electrical penetrations
* HVAC chases
* Fireplaces
Photograph major leakage pathways.
⸻
Phase 10 – Thermal Imaging
Operate the infrared camera under suitable conditions, ideally with an adequate indoor-to-outdoor temperature difference.
Inspect:
* Exterior walls
* Ceilings
* Floors
* Windows
* Doors
* Rim joists
* HVAC ducts
* Electrical panels
Look for:
* Missing insulation
* Thermal bridging
* Moisture patterns
* Air leakage signatures
Remember that thermal imaging reveals surface temperature differences. Confirm suspected issues with additional observations or testing before drawing conclusions.
⸻
Phase 11 – Combustion Safety Testing
If combustion appliances are present:
Test:
* Carbon Monoxide
* Draft
* Spillage
* Flue Gas Temperature
* Oxygen
* Carbon Dioxide
* Combustion Efficiency
Always complete combustion safety testing before and after significant air-sealing recommendations where required by program standards.
⸻
Phase 12 – Duct Leakage Evaluation
Inspect:
* Supply trunks
* Return trunks
* Boots
* Connections
* Flex duct
* Insulation
* Air handler
Measure:
* Leakage
* Airflow
* Temperature loss
⸻
Phase 13 – Moisture Investigation
Evaluate:
* Roof leaks
* Foundation moisture
* Condensation
* Relative humidity
* Vapor barriers
* Drainage
* Mold indicators
Moisture issues should be addressed before recommending certain insulation or air-sealing measures.
⸻
Phase 14 – Appliance Evaluation
Document:
* Water heater
* Refrigerator
* Dryer
* Range
* Dishwasher
* Pool equipment
* Lighting
* Plug loads
Look for opportunities to improve efficiency through equipment upgrades or operational changes.
⸻
Phase 15 – Advanced Building Performance Diagnostics
For deeper analysis, combine multiple diagnostic methods.
BPMS Thermal™
Use thermal imagery to document temperature patterns and support explanations of insulation deficiencies or air leakage.
BPMS FluxSense Analyzer™
Where available, measure heat flow through selected building assemblies. Combining heat-flux measurements with indoor and outdoor temperature data can help estimate thermal performance under real operating conditions.
LiDAR Scanning
Capture building geometry to support digital documentation and more accurate measurements.
⸻
Phase 16 – Analyze the Findings
Review all collected data together.
Prioritize findings based on:
* Safety
* Durability
* Moisture
* Comfort
* Energy savings
* Cost-effectiveness
Avoid evaluating components in isolation. Consider how recommended improvements may affect ventilation, combustion safety, moisture management, and HVAC performance.
⸻
Phase 17 – Develop Recommendations
Present recommendations in a logical order.
A common priority sequence is:
1. Health and Safety
2. Moisture Control
3. Air Sealing
4. Insulation Improvements
5. Duct Sealing
6. HVAC Optimization
7. Ventilation Improvements
8. Equipment Replacement
9. Renewable Energy Options
Explain why each recommendation is made, expected benefits, and any dependencies between measures.
⸻
Phase 18 – Generate the Audit Report
A professional report should include:
* Executive Summary
* Home Information
* Utility Analysis
* Diagnostic Results
* Blower Door Results
* Thermal Images
* Insulation Assessment
* HVAC Assessment
* Moisture Findings
* Combustion Safety Results
* Air Leakage Locations
* Recommended Improvements
* Estimated Benefits
* Supporting Photographs
⸻
Using BPMS™ Throughout the Audit
BPMS™ streamlines every stage of the workflow.
BPMSField™ supports field data collection, photos, notes, and inspection documentation.
BPMS Thermal™ organizes infrared images alongside audit records and findings.
BPMS FluxSense Analyzer™ is designed to supplement traditional diagnostics with direct heat-flow measurements, providing another source of data when evaluating thermal performance.
By combining field observations, diagnostic measurements, images, and recommendations in one platform, BPMS™ helps energy auditors produce organized, professional reports while reducing duplicate data entry.
⸻
Final Thoughts
A thorough home energy audit is built on careful observation, accurate measurements, and sound building-science principles. By following a structured process—from the initial homeowner interview to the final report—you can deliver consistent, defensible recommendations that improve comfort, reduce energy waste, and enhance the long-term performance of the home.
As new technologies such as thermal imaging, LiDAR, cloud-based reporting, and direct heat-flux measurement continue to evolve, energy auditors who integrate these tools thoughtfully into their workflow will be better positioned to provide high-quality, data-driven services and help homeowners make informed decisions about improving their homes.
Comments and Reviews
Share what you found helpful and how this article supported your work.
0.0/5from 0 reviews
No reviews yet. Be the first to share your feedback.